
Windows 7 (the successor to Windows Vista) was released to the public on October 22, 2009, and was more successful than Windows Vista. The graphical user interface of Windows 7 is similar to Windows Vista, glass-like interface design (known as Windows Aero) is available in all versions of Windows 7 (except the Starter Edition). Compared to the earlier version, many new features have been added to the user interface, such that the taskbar can now pin the app, users can use the photo slideshow as a desktop wallpaper, redesign of Windows Explorer and Notification area, new jump list menu when right-click in the taskbar app, new keyboard shortcuts to control UI elements, new Window management features, and much more.
Showing posts with label How to.... Show all posts
Showing posts with label How to.... Show all posts
![Windows 7 SP1 ULTIMATE ENU (6in1) ISO [x86-x64] Nov 2020 [Pre-Activated]](https://blogger.googleusercontent.com/img/b/R29vZ2xl/AVvXsEh1wxhHTM6cDN1BwHHU4OPm__VEn9A2HkwkHOF7KqI31pGhfBn278mtawjzZnxT_Qgh9rrNIUs6pWw006u5dgUSRaGWluKzNYlrI3x7YjbFIzqCecf-qirwtphtZjQ8_RxbTUH2jDmG_Eo/s160/w7U_1.png "Windows 7 SP1 ULTIMATE ENU (6in1) ISO [x86-x64] Nov 2020 [Pre-Activated]")
How To Make Bootable USB

How to Recover Your Router Password

How to Reduce (used) Memory in All Windows

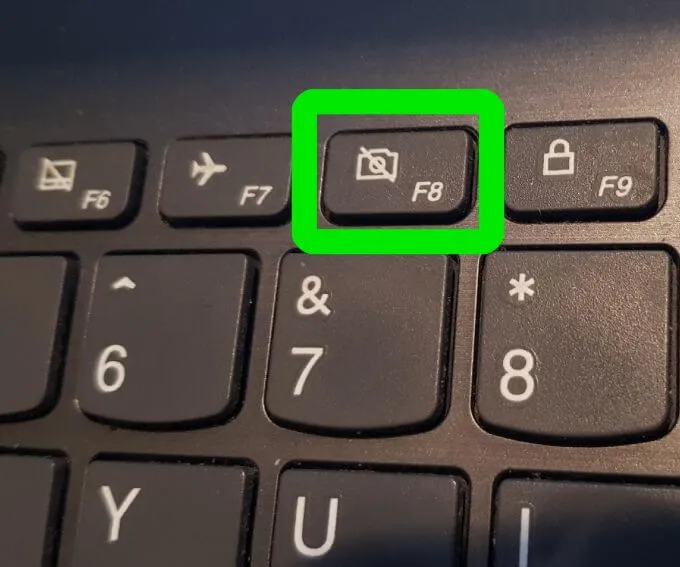
How to Launch Windows in Safe Mode (All Windows)

How to Uninstall Cortana from Windows 10

There are already many applications will also do this except none right now uninstall Cortana except wimtweak. we like W10 Privacy because it will uninstall the Metro Apps from User and System. Has many tweaks to disable Privacy things
How to use Google Drive as Backup and as File Stream

To sign in to your work or school account, click here.
- Backup and Sync syncs and stores Drive content locally on your computer.
- Drive File Stream streams all files and folders from the cloud. You can only use Drive File Stream with a Google Account through work or school.
Compare Backup and Sync & Drive File Stream
| Backup and Sync | Drive File Stream | |
|---|---|---|
| Use files in My Drive | Yes | Yes |
| Use files in shared drives | No | Yes |
| Sync only selected folders in My Drive* | Yes | Yes |
| Sync only individual files in My Drive* | No | Yes |
| Use native apps, like Microsoft Office & Photoshop | Yes | Yes |
| See who's editing with real-time presence in Microsoft Office | No | Yes |
| Integrates with Microsoft Outlook, Meet scheduling | No | Yes |
| Sync other folders, like Documents or Desktop | Yes | No |
| Use with your personal Google Account | Yes | No |
| Use with your work or school Google Account | Maybe | Yes |
| Upload photos and videos to Google Photos | Yes | No |
*With Drive File Stream, you can make selected files or folders 'Available offline' to sync them to your computer rather than an online stream.
DOWNLOAD BACKUP & SYNC DOWNLOAD DRIVE FILE STREAM
USEFUL LINKS
https://support.google.com/drive/answer/7638428
https://support.google.com/drive/answer/7329379
Fix problems syncing to your computer
How to Learn Typing on PC (Type Tutors)

How to Reveal Passwords using PwdCrack

Using: Just hover the mouse on the password and inhospitable place of asterisks see the desired password.
Multilingual version supports follows languages: English, Chinese, Czech, Danish, French, Filipino, German, Greek, Hindi, Italian, Nederlands, Polish, Portugues (Brazilian), Russian, Spanish, Sinhala, Ukrainian, Zhope.

How to use Password Cracker?
- Start pwdcrack.exe.
- Click on button Enable.
- Move mouse pointer on password.
- See to field View.
Try the our TwinkiePaste. TwinkiePaste is the utility to quickly typing commonly used text, dates, greetings, standard responses, Internet URLs, logins and passwords, code templates…read more
Q: Does Password Cracker work with MS Word/MS Excel documents?
No. Another type of protection which is not supported by the program is used in MS Office documents. You can unlock your documents with the help of the Password-Find online service.

Q: How to choose language of Password Cracker?
Click on button Language.
Choose language from submenu Languages.
Q: Where get English language file for Password Cracker? (English.lng)
English language is embedded. The file english.lng does not exist and is not needed.
Q: How could uninstall Password Cracker?
Delete all files of Password Cracker.

File Size 119 KB
How to Start your Computer in Safe Mode in Windows 10
Start Windows 10 in Safe Mode Using System Configuration tool
Also, you can use the system configuration tool to start windows 10 in safe mode following steps below.


2. On the Command Prompt screen, type bcedit /set {default} bootmenupolicy legacy and press the Enter key on the Keyboard of your computer.
3. Type Exit and press the Enter key to or simply close the Command Prompt Window.


And finally you need press F4, F5, or F6 to choose a desired Safe Mode option to start Windows 10 in Safe Mode while booting.


Disable F8 Key Safe Mode Option in Windows 10
2. On the Command Prompt screen, type bcedit /set {default} bootmenupolicy STANDARD and press the Enter key.
Also, you can use the system configuration tool to start windows 10 in safe mode following steps below.
- Press Windows key + R, type msconfig and click ok,
- This will open the System Configuration panel.
- Move to boot Tab And Check the Safe Boot bellow Boot options (refer image below)

Here You will get four radio buttons
- The Minimal option Starts Safe Mode with the absolute minimal amount of drivers and services and with the standard Windows GUI (Graphical User Interface).
- Alternate Shell Starts Safe Mode with a Command Prompt, without the Windows GUI. Requires knowledge of advanced text commands, as well as navigating the operating system without a mouse.
- Active Directory Repair Starts Safe Mode with access to machine-specific information, such as hardware models. If we unsuccessfully install new hardware, corrupting the Active Directory, Safe Mode can be used to restore system stability by repairing corrupted data or adding new data to the directory.
- Selecting Network Starts Safe Mode with the necessary services and drivers for networking, with the standard Windows GUI.
Let’s Select the Minimal option and click Apply, and OK. System Configuration will now ask if you want to restart your system. Selecting Restart will immediately initiate the restart process, so be sure to save any active documents or projects.
How to get out of Windows Safe Mode
If you have started windows 10 in safe mode using F8 or from advanced startup options, this will only once start your computer in safe mode, once you restart your PC this will boot windows normally. But if you have started Windows 10 in Safe Mode Using System Configuration tool this will everytime start your PC into safe mode. And you need uncheck safe option mode under System Configuration tool to get out of windows safe mode. Let’s see how to do.
- Press Win + R, type msconfig, and press Enter.
- This opens System Configuration. Select the Boot tab. If the Safe boot option is checked, uncheck it. Then reboot.
What is safe mode windows 10?
Safe Mode is an essential diagnostic method help you identify and fix possible causes of Windows 10 PC problems. When you start Windows 10 in safe mode it will only allow starting up basic system programs and services in the booting process. That means when you start your computer in safe mode the OS will be started with only core components, and many other non-necessary drivers or services such as video drivers, the sound will be disabled. For example, if Windows 10 freezes or restart frequently after installing a problematic driver or a third party software you can boot windows 10 in safe mode to uninstall the problematic driver or software to fix the problem.
Windows having Three Types of safe mode Options available.
- Boot Into Safe mode
- Safe Mode with Networking
- Safe Mode With the command prompt
Enable F8 Key Safe Mode option in Windows 10
Many users feel that the earlier method of booting Windows computer in Safe Mode by pressing the F8 Key during the Startup process was easy.
Luckily, the F8 Key method of booting Windows computer into Safe Mode can still be enabled on your computer by using the following steps.
Many users feel that the earlier method of booting Windows computer in Safe Mode by pressing the F8 Key during the Startup process was easy.
Luckily, the F8 Key method of booting Windows computer into Safe Mode can still be enabled on your computer by using the following steps.
1. Right-click on the Start button and click on Command Prompt (Admin).

2. On the Command Prompt screen, type bcedit /set {default} bootmenupolicy legacy and press the Enter key on the Keyboard of your computer.

4. Restart your computer for this change to be implemented.
After this, you should be able to Boot your computer in Safe Mode by repeatedly pressing the F8 key, while the computer is starting up.
Make sure that you are pressing and releasing the F8 key and not holding it down. If you miss the opportunity to Enter Safe Mode, simply restart your computer and repeat the process.
Start Windows 10 in Safe Mode from Settings
If you are alreay login into windows 10 computer, you can start Windows 10 in safe mode from advanced Startup tool and diagnose any issue.
You can access the advanced startup tool following the steps below.
Using settings:
- Press Windows key + I to open the Settings app,
- Click update & security the Windows update,
- Choose Recovery option from the left panel,
- Then click Restart now under Advanced startup to enter Windows RE

From Start Menu
Also, you can press and hold Shift key on the keyboard, and click Start menu on Windows 10 at the same time. Then click the Power icon in the Start menu and choose Restart. This will open the Advanced Startup Screen.

- From here this time will load an options screen.
- Select ‘Troubleshoot’ > ‘Advanced options’ > ‘Startup Settings’ > ‘Restart’.

And finally you need press F4, F5, or F6 to choose a desired Safe Mode option to start Windows 10 in Safe Mode while booting.

Start into Safe Mode when Windows won’t boot normally
Well if due to some problem or after install an incompatible driver or third party software Windows 10 won’t start normally you can follow steps below to boot into safe mode and fix the problem.
Using Automatic Repair
Basically when windows 10 computer won’t start normally 3 times it automatically enter into the Automatic Repair window and try to fix the problem itself.
Well If the Automatic Repair couldn’t repair your Windows 10 PC problems, click Advanced options.

If you are noticing that your computer is taking a few seconds longer to startup, disable F8 Key Safe Mode and see if this improves the startup time.
1. Right-click on the Start button and click on Command Prompt (Admin).

2. On the Command Prompt screen, type bcedit /set {default} bootmenupolicy STANDARD and press the Enter key.

3. Close the Command Prompt window and Restart your computer.
After this, you won’t be able to boot your computer into Safe Mode by using the F8 Key.
How to Change Windows Product Key After Install

Method 1: Command Line Utility
You can use a great command line tool that will help you do this very quickly. Just follow these steps:
Here is the simple and easy way work on all windows editions include Windows 10, 8.1 and 7.
- Search for command prompt, right click and select run as administrator,
- Then Type slmgr.vbs /ipk <Input your product key here> and hit Enter.
- Once Windows 10 gets activated you will get “Installed Product Key XXXXXX successfully” message.
slmgr.vbs -ipk 00000-00000-00000-00000-00000
To activate windows after changing the key, run "slmgr.vbs -ato"

Show Key Plus
OEM Key Finder
- Press the Windows logo key + I keyboard shortcut.
- Select Update & Security.
- Move down to the Activation option.
- Click Change product key.
- Enter the 25-digit product key for the edition of Windows 10 you want, press Enter.
- And click Next When the Activate Windows appears,

Method 2: using Slui.exe
- Press the Windows logo key + R shortcut in order to evoke the Run app.
- Once Run is up, type slui.exe 3 and click OK or hit the Enter key.
- Then Enter your 25-digit product key and press Enter.
- follow on screen instructions to change windows 10 product key.
- Change product key from Use Control Panel


The easiest way to change your product key in Windows 8 and 7 is via Control Panel.
- Open your Start menu and locate Control Panel. Click on it.
- Click on System and security. Then select System.
- Click “Get more features with a new edition of Windows”.
- Select “I already have a product key”.
- Then enter your product key and click on Next.
Windows 10 Activation Errors
But what if you get Activation Error? Here follow the simple process to Reset your license status and then re-enter your product key.
- Search for command prompt right click and select run as administrator
- At the command prompt, type slmgr.vbs -rearm
- Hit Enter on your keyboard
- Exit the command prompt
- Restart your computer
- Enter the product key using the above instructions
How to Manage Windows Features from Command Line with DISM

Using DISM requires an administrative level command prompt. Click on the Start Button, type in cmd, hold down Shift and Ctrl and hit Enter (holding down Shift and Ctrl while hitting enter will start any command you type in as administrator).
Once you have your Administrative level command prompt running you can start experimenting with DISM. To get a list of features you can type in dism /online /get-features | more and hit Enter.
The output will be similar to this:
Feature Name : OEMHelpCustomization
State : Disabled
Feature Name : CorporationHelpCustomization
State : Disabled
Feature Name : SimpleTCP
State : Disabled
Feature Name : SNMP
State : Disabled
Feature Name : WMISnmpProvider
State : Disabled
Feature Name : TelnetServer
State : Disabled
Feature Name : TelnetClient
State : Disabled
Feature Name : WindowsGadgetPlatform
State : Enabled
Feature Name : InboxGames
State : Disabled
Feature Name : More Games
State : Disabled
Feature Name : Solitaire
State : Disabled
Feature Name : SpiderSolitaire
State : Disabled
Feature Name : Hearts
State : Disabled
Feature Name : FreeCell
State : Disabled
Feature Name : Minesweeper
State : Disabled
Feature Name : PurblePlace
State : Disabled
Feature Name : Chess
State : Disabled
Feature Name : Shanghai
State : Disabled
Feature Name : Internet Games
State : Disabled
Feature Name : Internet Checkers
State : Disabled
Feature Name : Internet Backgammon
State : Disabled
Feature Name : Internet Spades
State : Disabled
Feature Name : IIS-WebServerRole
State : Disabled
Feature Name : IIS-WebServer
State : Disabled
Feature Name : IIS-CommonHttpFeatures
State : Disabled
Feature Name : IIS-HttpErrors
State : Disabled
Feature Name : IIS-HttpRedirect
State : Disabled
Feature Name : IIS-ApplicationDevelopment
State : Disabled
Feature Name : IIS-NetFxExtensibility
State : Disabled
Feature Name : IIS-HealthAndDiagnostics
State : Disabled
Feature Name : IIS-HttpLogging
State : Disabled
Feature Name : IIS-LoggingLibraries
State : Disabled
Feature Name : IIS-RequestMonitor
State : Disabled
Feature Name : IIS-HttpTracing
State : Disabled
Feature Name : IIS-Security
State : Disabled
Feature Name : IIS-URLAuthorization
State : Disabled
Feature Name : IIS-RequestFiltering
State : Disabled
Feature Name : IIS-IPSecurity
State : Disabled
Feature Name : IIS-Performance
State : Disabled
Feature Name : IIS-HttpCompressionDynamic
State : Disabled
Feature Name : IIS-WebServerManagementTools
State : Disabled
Feature Name : IIS-ManagementScriptingTools
State : Disabled
Feature Name : IIS-IIS6ManagementCompatibility
State : Disabled
Feature Name : IIS-Metabase
State : Disabled
Feature Name : WAS-WindowsActivationService
State : Disabled
Feature Name : WAS-ProcessModel
State : Disabled
Feature Name : WAS-NetFxEnvironment
State : Disabled
Feature Name : WAS-ConfigurationAPI
State : Disabled
Feature Name : IIS-HostableWebCore
State : Disabled
Feature Name : IIS-StaticContent
State : Disabled
Feature Name : IIS-DefaultDocument
State : Disabled
Feature Name : IIS-DirectoryBrowsing
State : Disabled
Feature Name : IIS-WebDAV
State : Disabled
Feature Name : IIS-ASPNET
State : Disabled
Feature Name : IIS-ASP
State : Disabled
Feature Name : IIS-CGI
State : Disabled
Feature Name : IIS-ISAPIExtensions
State : Disabled
Feature Name : IIS-ISAPIFilter
State : Disabled
Feature Name : IIS-ServerSideIncludes
State : Disabled
Feature Name : IIS-CustomLogging
State : Disabled
Feature Name : IIS-BasicAuthentication
State : Disabled
Feature Name : IIS-HttpCompressionStatic
State : Disabled
Feature Name : IIS-ManagementConsole
State : Disabled
Feature Name : IIS-ManagementService
State : Disabled
Feature Name : IIS-WMICompatibility
State : Disabled
Feature Name : IIS-LegacyScripts
State : Disabled
Feature Name : IIS-LegacySnapIn
State : Disabled
Feature Name : IIS-FTPServer
State : Disabled
Feature Name : IIS-FTPSvc
State : Disabled
Feature Name : IIS-FTPExtensibility
State : Disabled
Feature Name : IIS-WindowsAuthentication
State : Disabled
Feature Name : IIS-DigestAuthentication
State : Disabled
Feature Name : IIS-ClientCertificateMappingAuthentication
State : Disabled
Feature Name : IIS-IISCertificateMappingAuthentication
State : Disabled
Feature Name : IIS-ODBCLogging
State : Disabled
Feature Name : MediaPlayback
State : Enabled
Feature Name : WindowsMediaPlayer
State : Enabled
Feature Name : MediaCenter
State : Enabled
Feature Name : OpticalMediaDisc
State : Enabled
Feature Name : NetFx3
State : Enabled
Feature Name : WCF-HTTP-Activation
State : Disabled
Feature Name : WCF-NonHTTP-Activation
State : Disabled
Feature Name : RasRip
State : Disabled
Feature Name : RasCMAK
State : Disabled
Feature Name : MSMQ-Container
State : Disabled
Feature Name : MSMQ-Server
State : Disabled
Feature Name : MSMQ-Triggers
State : Disabled
Feature Name : MSMQ-ADIntegration
State : Disabled
Feature Name : MSMQ-HTTP
State : Disabled
Feature Name : MSMQ-Multicast
State : Disabled
Feature Name : MSMQ-DCOMProxy
State : Disabled
Feature Name : TabletPCOC
State : Enabled
Feature Name : ServicesForNFS-ClientOnly
State : Disabled
Feature Name : ClientForNFS-Infrastructure
State : Disabled
Feature Name : NFS-Administration
State : Disabled
Feature Name : SUA
State : Disabled
Feature Name : Printing-Foundation-Features
State : Enabled
Feature Name : Printing-Foundation-LPRPortMonitor
State : Disabled
Feature Name : Printing-Foundation-LPDPrintService
State : Disabled
Feature Name : Printing-Foundation-InternetPrinting-Client
State : Enabled
Feature Name : FaxServicesClientPackage
State : Enabled
Feature Name : ScanManagementConsole
State : Disabled
Feature Name : Xps-Foundation-Xps-Viewer
State : Enabled
Feature Name : TFTP
State : Disabled
Feature Name : MSRDC-Infrastructure
State : Enabled
Feature Name : Printing-XPSServices-Features
State : Enabled
Feature Name : Indexing-Service-Package
State : Disabled
Feature Name : Internet-Explorer-Optional-x86
State : Enabled
Feature Name : TIFFIFilter
State : Disabled
Feature Name : SearchEngine-Client-Package
State : Enabled
To enable a feature you need the full feature name as displayed on the previous /get-features command. The full feature name is case sensitive! Once you have the full feature name type in dism /online /enable-feature /featurename:<feature name> and hit Enter.
For example, to enable Media Center run dism /online /enable-feature /featurename:MediaCenter.
To disable a feature type in dism /online /disable-feature /featurename:<feature name> and hit Enter.
For example, to disable Media Center run dism /online /disable-feature /featurename:MediaCenter.
Enabling or disabling some features will require a reboot. If you are using the DISM command within a script and want to prevent asking to reboot simply append /NoRestart to the end of your command.
for More Info.... Click Here
How to Remotely Manage a Non-Domain Hyper-V Server from Windows 10

I tried to use the Hyper-V Manager client on my Windows 10 PC to connect to my Hyper-V host unsuccessfully for months. It seemed no matter what I tried, I ran into various issues trying to get my Windows 10 PC to authenticate to the Hyper-V host. It wasn't until I stumbled across this TechNet article that inspired me to give local Hyper-V manager client a second chance. With a few minor tweaks, I was finally able get it working. If you are in the same boat as me, below I detailed each step I took so that you too can remotely manage a Windows Server 2016 Hyper-V server from Windows 10.
Hyper-V Server Configuration
First, we need to configure the Hyper-V host to accept remote connections:
- Log into your Windows server with an administrative level account.
- Click on the Start button, type in Windows PowerShell and hit Enter.
- At a PowerShell prompt, run the following commands:
Enable-PSRemoting
Enable-WSManCredSSP -Role server
Make sure to hit Y to confirm you want to enable CredSSP.
Windows 10 Client Configuration
Next, let's setup the client side:
- Click on the Start Button and type in Turn windows features on or off and hit Enter.
- Navigate through the list of features and check the Hyper-V GUI Management Tools and then click OK.

- Make sure your network connection location is set to private. If it is not set to private, the commands in step 5 will fail. Take a look at this quick tip to change your network location to private.
- Next, right click on the Start Button and select Windows PowerShell (Admin).

- Type in the following PowerShell commands. My Windows server is called homeserver (named after one of Microsoft best products), make sure to replace "homeserver" in the commands below with the hostname of your Hyper-V host. Hit Y to continue when prompted by the commands to modify the TrustedHosts list and enable CredSSP authentication.
Enable-PSRemoting
Set-Item WSMan:\localhost\Client\TrustedHosts -Value "homeserver"
Enable-WSManCredSSP -Role client -DelegateComputer "homeserver"

- Now we need to change the credential delegation settings on your PC to allow for the non-domain NTLM authentication. Click on the Start Button, type in gpedit.msc and hit Enter to open the Local Group Policy Editor.
- Navigate through Computer Configuration, Administrative Templates, System, Credential Delegation, and right click on "Allow delegating fresh credentials with NTLM-only server authentication" and select Edit.

- Select Enabled, then click the Show button.

- Type in Wsman/homeserver (remember to replace "homeserver" with the name of your hyper-v host)

- Click OK to close the list window and OK again to close the policy window.
Ready to Connect
You are now ready to launch the Hyper-V Manager on your local PC. There are a few extra steps that are necessary to connect in the non-domain joined scenario.
- Click on the Start Button and type in Hyper-V Manager and hit Enter.
- When the Hyper-V Manager loads, click the Connect to a Server item under Actions.
- Select Another computer and type in the name of your server.

- Check the "Connect as another user" box and then click Set User.
- Type in the username in hostename\user format. For example, "homeserver\administrator"

- Click OK on the Windows Security screen after entering an administrative user and password that exists on your Hyper-V server.
- And then click OK on the Select Computer window to connect to your host. Within a few seconds, you should see a list of your Hyper-V virtual servers and workstations.
HyperV Performance Monitor Free Tool
File Size 6.6 MB
Subscribe to:
Posts (Atom)


